

How To Repair A Kindle Keyboard
Introduction
Use this guide to replace a cracked, scratched, or faulty display (screen) in your Kindle three.
-
-
Starting 15mm below the right page-turning push, insert the middle of the pry tool. Pry open the back of the device using the pry tool, or like plastic opening tool. The flexi cablevision for the screen is 10mm wide and passes 10mm to 20mm below the right page plow and is very like shooting fish in a barrel to tear the edge.
-
-
-
Unscrew the two silver 4 mm Phillips screws securing the bombardment connector.
-
-
-
Lift battery out of housing starting at the terminate that was secured by the screws.
-
-
-
Remove 6 silverish Phillips screws from the locations shown.
-
-
-
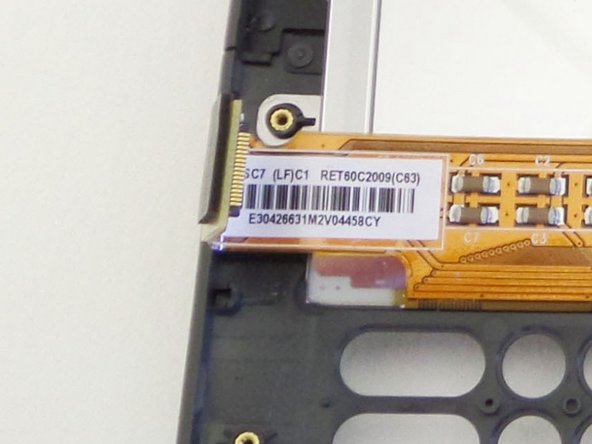
Pry the display connector straight up from its socket on the motherboard to disconnect it.
-
-
-
Remove eleven smaller, greyness-colored Phillips screws from the locations shown.
-
-
-
Lifting from the top edge, slide the entire motherboard and midframe associates together away from the bottom edge of the Kindle, and remove information technology carefully.
-
-
-
Remove the damaged screen from the housing.
-
Press gently from the outside to the inside. Be conscientious not to break the frame.
-


Conclusion
To reassemble your device, follow these instructions in reverse order.
Embed this guide
Choose a size and copy the code below to embed this guide as a pocket-size widget on your site / forum.
Preview

How To Repair A Kindle Keyboard,
Source: https://www.ifixit.com/Guide/Kindle+3+Screen+Replacement/29843
Posted by: parkpresucest.blogspot.com
0 Response to "How To Repair A Kindle Keyboard"
Post a Comment